Adding and Replacing Files
You will first need to be logged in via the /user page. For example, the following link would be used on this site: webtech.wwu.edu/user
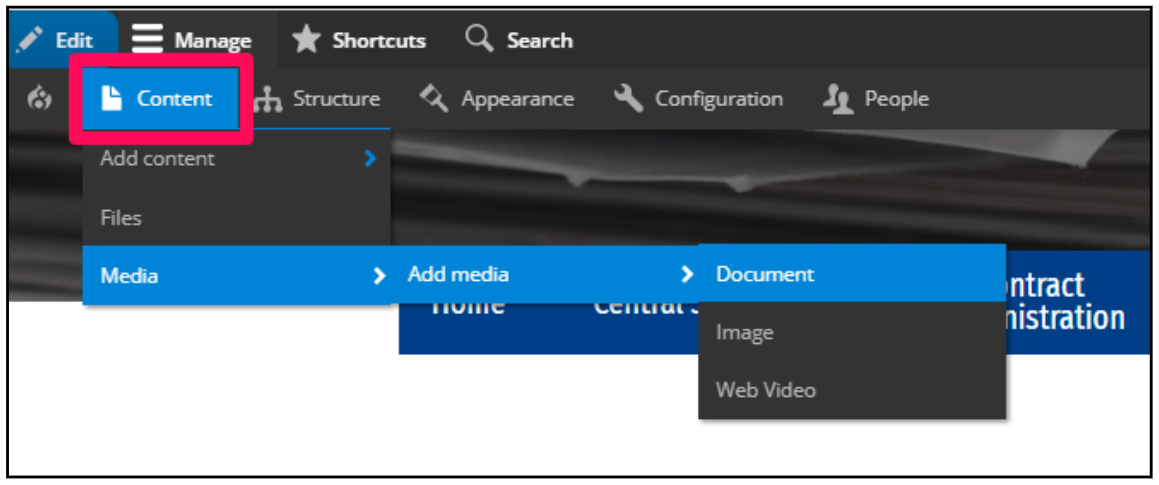
How to Add Files
Using the Administration Menu at the very top of the page, go to Content > Media > Add Media. From here, you can select Document, Image, Web Video, or possibly other media types depending on the configuration of your site. Select Document to upload PDF, DOC, or XLSX files.
On the Add Document page, select Choose File to upload a file. Your file must be of one of the allowed types. If you need to upload a file that does not have one of these file extensions, contact a site administrator to find out if your extension can be securely added.
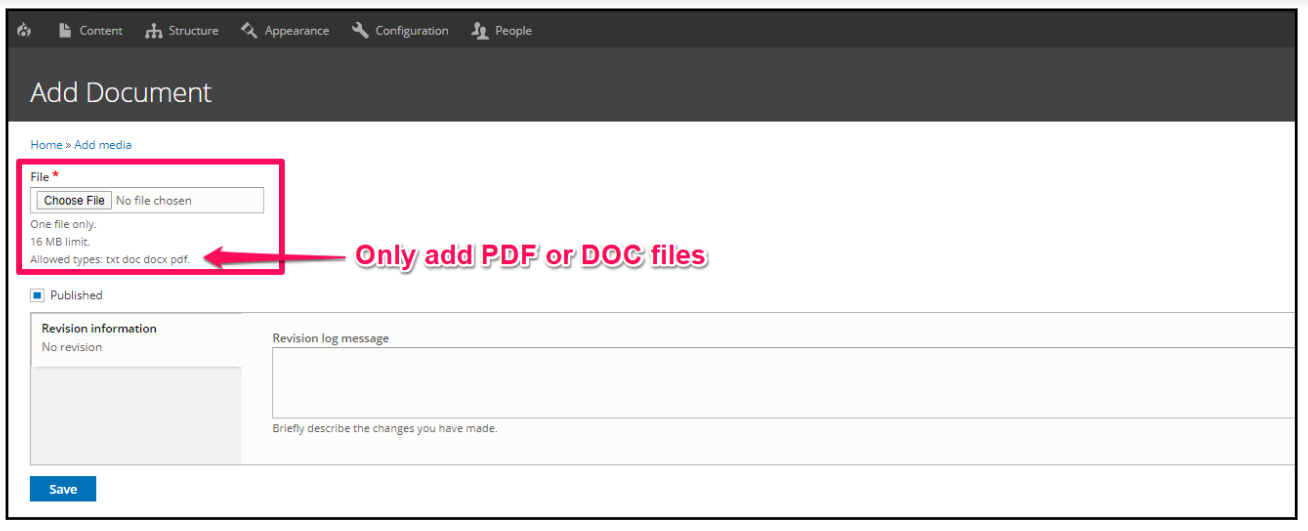
After uploading the file, click Save.
How to Replace Files
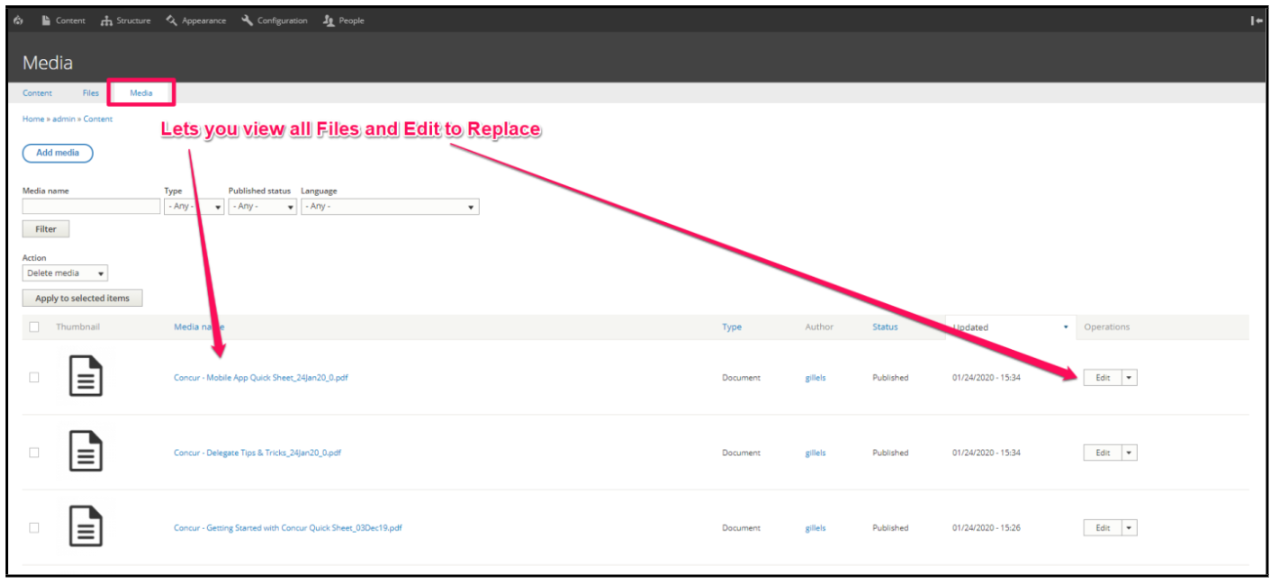
Navigate to Content > Media and find the file you want to replace. You can search by ‘Media Name’ or scroll the list to find it. Once found, click on the Edit button.
On the Media entity's page, click the Remove button. Then click Choose File to upload a replacement.
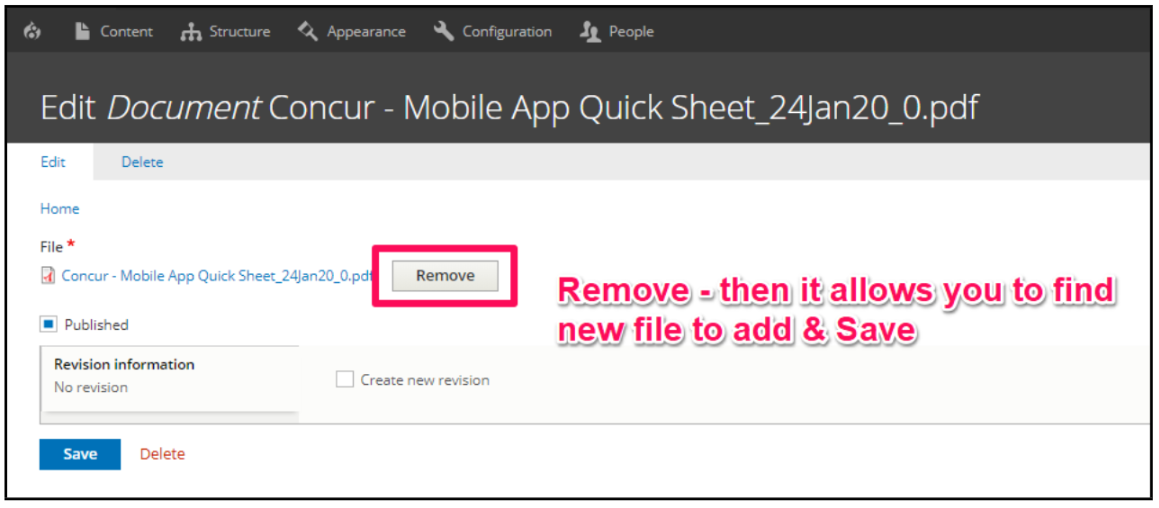
When done, click Save.
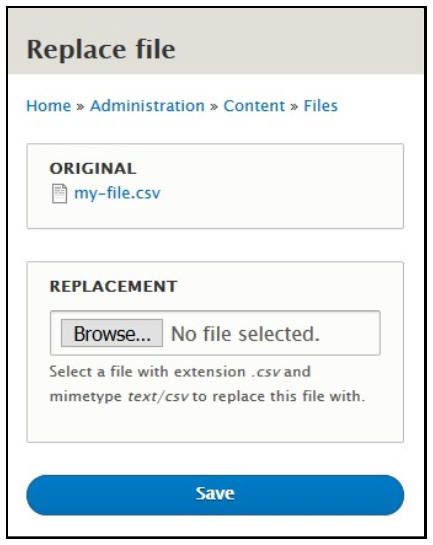
File Replace Module
The file replace module is a small utility providing site administrators with the possibility to replace files, keeping the file uri intact. This is useful in cases where a file is linked or used directly but needs to be updated occasionally.
Installation and usage
If the module File Replace is not already enabled on your site, contact WebTech to have it installed.
The module currently only provides a 'Replace' page for files. You will need to manually add links to the file overview page. Simply adding a global text field with a link like the following would work fine:
admin/content/files/replace/{{ fid }}